
Dynamic Duos: Integrating Jira & Shoutbase Using Zapier

Good things are better together. Peanut butter and jelly. Pizza and beer. Sam and Frodo. Coffee and another cup of coffee. Some combos just hum harmoniously together and become more than the sum of their parts. When I find new ways to combine tools to streamline my workflow and enhance my productivity, it’s time to celebrate.
That’s where Zapier comes in. Zapier is an online tool that integrates the web apps you already use and helps them work better together. Just one example of the way I use Zapier is my “Zap” for time tracking Jira issues with Shoutbase tags. What does that mean? Thanks to Zapier, every time I create a new issue in Jira, a new tag is automatically created in my Shoutbase account.
Why? Jira is great for tracking issues, and it’s an important part of my workflow as a software engineer. But Jira is not the best for time tracking. Enter Shoutbase. Shoutbase makes time tracking dead simple, and it has a number of other features that make my life easier, such as time-based goal tracking, reports, and team management. With automatic tag creation through Zapier, I can seamlessly start tracking time for a Jira issue in Shoutbase. At the end of the week, when I need to enter my time for Jira issues, I pull the report for my tag in Shoutbase and have an accurate time calculation to record in Jira. It saves me time and also alleviates the guessing game of “what did I work on?” and “how much time did I spend?”
Whether or not you’re new to Zapier, Jira, or Shoutbase, this step-by-step guide will show you how to create a Zap from scratch and help you on your way to creating your own online tool dynamic duo.
Getting Started
Before creating this integration, make sure you have the following accounts set up and a basic understanding of the systems we’ll be working with. If you’re new to one or more of the technologies listed, I’ll include information about getting started with each.
Shoutbase
Shoutbase is a time tracking system built for speed and simplicity. It’s optimized for fast data entry that lets you record time quickly, so you can get back to what you’re doing with minimal disruption. Shoutbase is free for individual users, and setting up an account is a breeze.
Jira Software
Jira is a popular work management tool used by software and product teams. It supports a wide range of use cases, such as bug and issue tracking, managing requirements and test cases, and time tracking. If you’re brand new to Jira Software, you can start a free trial.
Zapier
Zapier is a tool that helps you integrate the different web applications you use, helping you save time and energy. Zapier also includes a free trial and a free tier. If you are brand new to Zapier, check out their Getting Started Guide to gain a basic understanding of using the tool and creating “Zaps” before continuing with this tutorial.
Technical Design
Before jumping into creating the Zap, here is a brief technical design of how our integration will work.
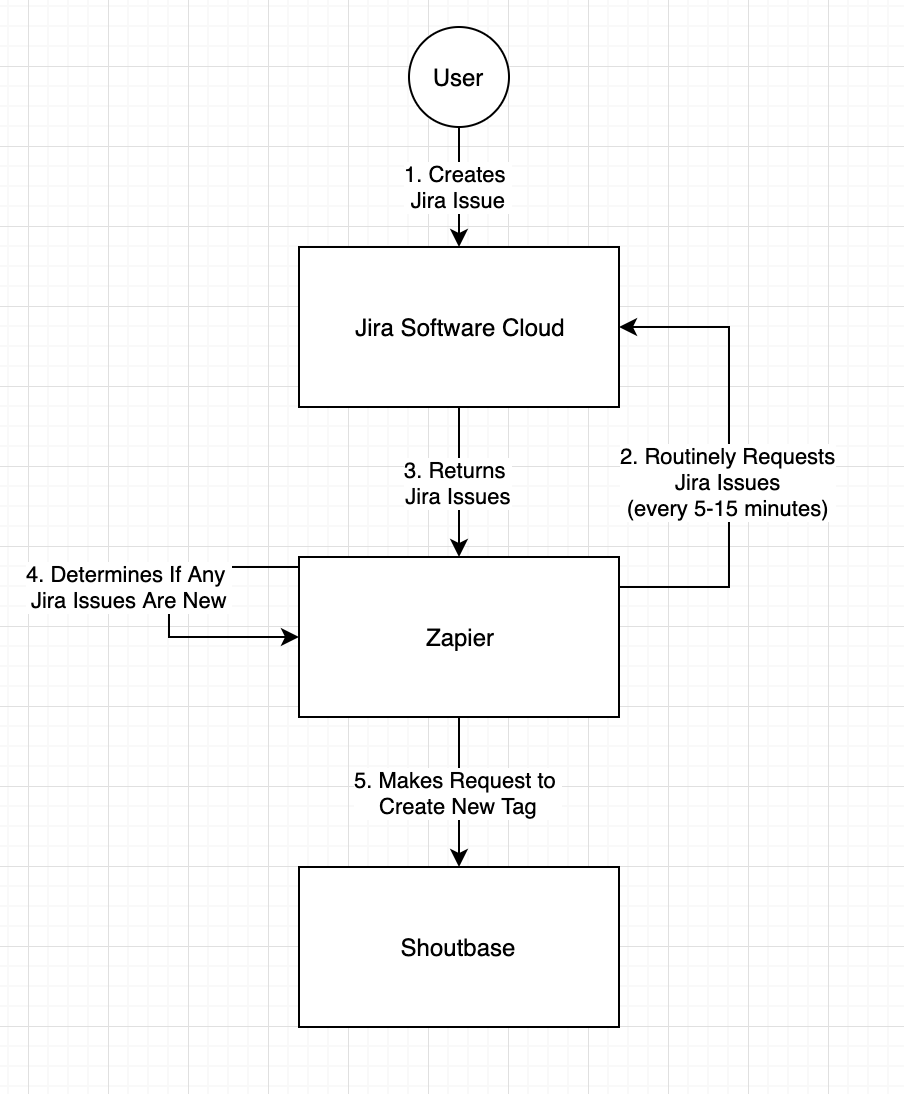
- User creates a new issue in Jira. This is our “Trigger,” which means this event will cause Zapier to run the processes we define in our Zap.
- Zapier polls Jira for new Issues. Every 5-15 minutes, Zapier will make another request to Jira to fetch issues for a given project.
- Jira responds with a set of issues.
- From Jira’s response, Zapier determines if there are any new items since the last time it made a request. If there are no new issues, nothing happens, and Zapier resets to make the request again in 5-15 minutes. If there is a new item, Zapier continues to the next step.
- When a new issue is found, Zapier uses the data from the previous step to call the Shoutbase API to insert a new tag with the same name as the Jira issue.
The following uml diagram illustrates how information is requested, transformed, and passed through the integration system.
Create a New Zap
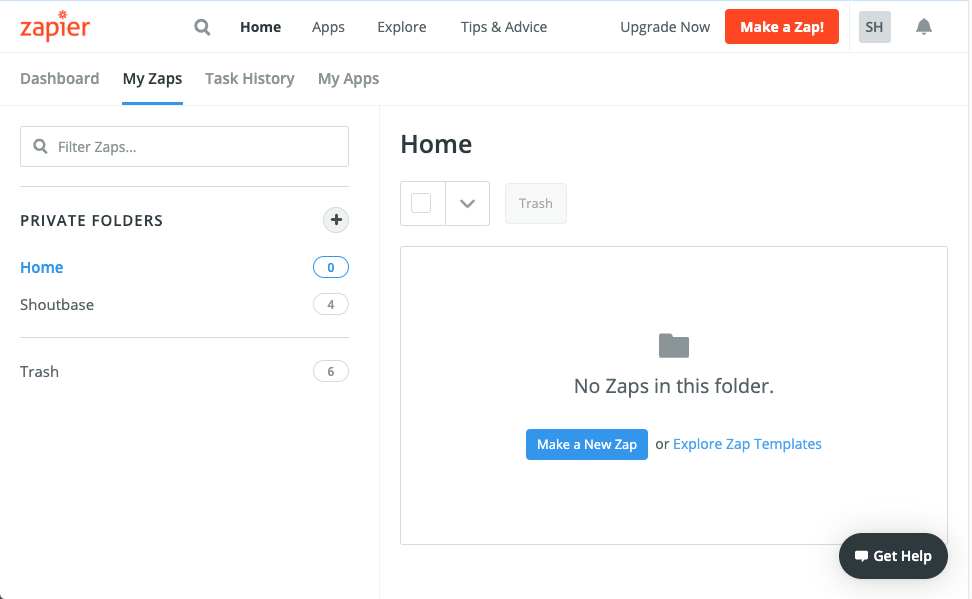
Log into your Zapier account. Once logged in, click “My Zaps.” Here, you will see your Zap dashboard. This is where you can see and control the Zaps you’ve created in the past or create a new Zap. Click the “Make a Zap!” button.
Trigger Definition
The first step to creating a Zap is defining your trigger. A trigger is an action that occurs in one system that causes something to happen in another system. In our case, “New Issue in Jira Software Cloud” will be the trigger.
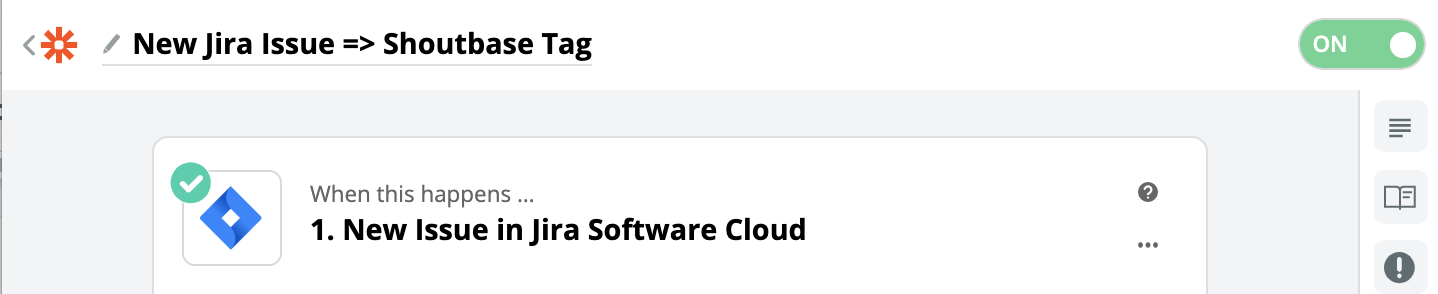
1. Name Your Zap
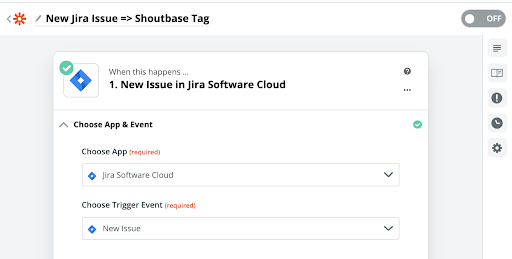
I like to name Zaps very explicitly, so I can easily know what my triggers and actions are just by reading the name. In this case, I’m naming my Zap “New Jira Issue => Shoutbase Tag.” You can use this or choose something different.
2. Choose Triggering App
Search and select “Jira Software Cloud” as the app.
3. Select Trigger Event
From the dropdown menu, select “New.” This is a polling trigger event, which means the Zapier API will make regular requests (every 5-15 minutes) to check if there are any new issues for your Shoutbase account. When there are, it will continue to the next step.
4. Connect Your Account & Project
Continue to connect your Jira Software account in the authorization popup window. Next, select the project from your Jira Software that you want to use.
5. Finish Trigger
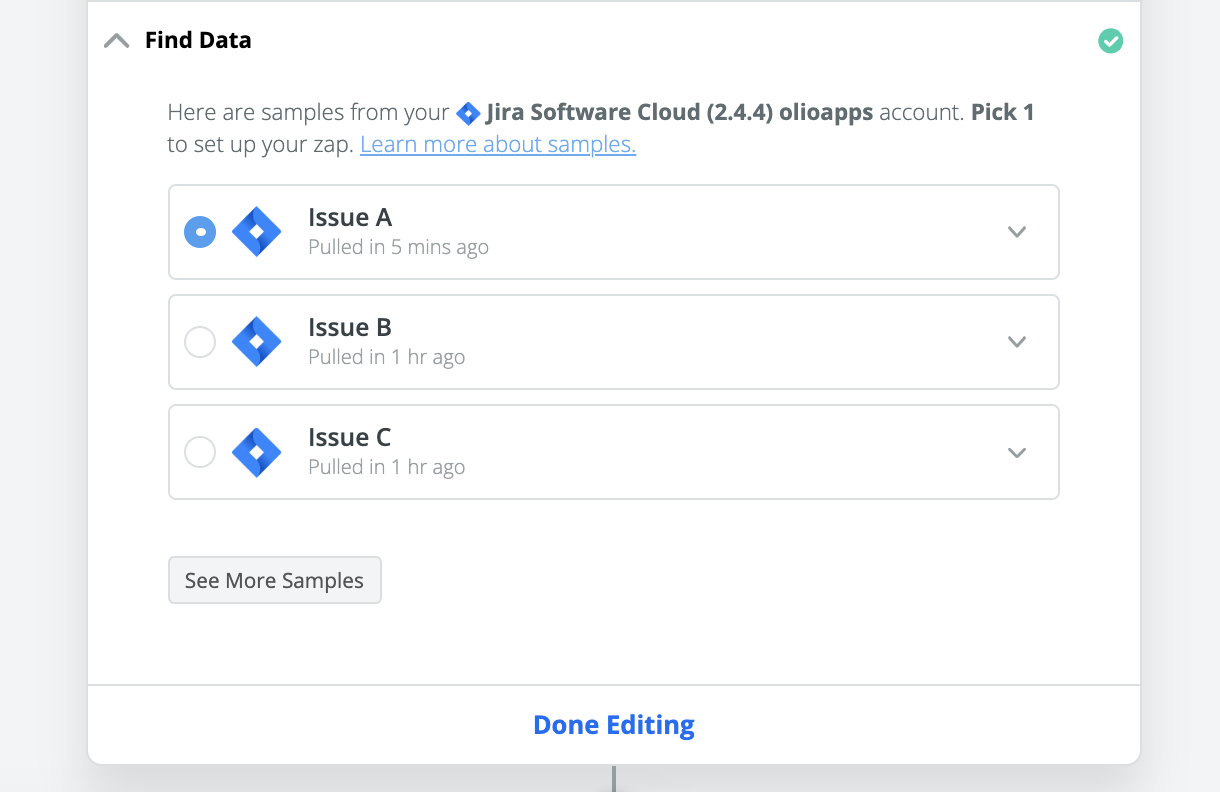
Next is the “Find Data” section. Here, Zapier will poll the Jira API for recent issues on your project to give you an idea of the data you’ll be working with for the rest of the Zap.
If you are new to Jira and haven’t created any issues or projects, create an issue now, so Zapier has something to work with. Click the “Test & Continue” button. This will poll for new issues. Select one of the issues and continue. And that’s it for the trigger.
Action Definition
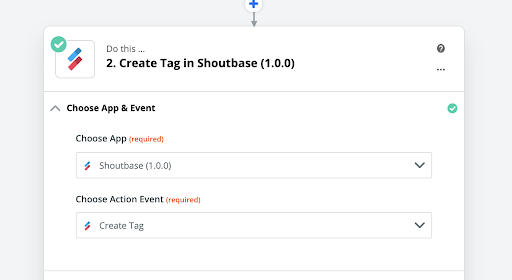
1. Add Shoutbase Action
The Shoutbase Zapier integration is new and currently in beta version. You’ll have to use this invitation link to use Shoutbase in Zapier. In the future, you’ll be able to select Shoutbase from the list of other applications.
https://zapier.com/developer/public-invite/31432/fa70581019fd453aed7317c47eb43d99/
After accepting the invite in the link, select Shoutbase as the app and “Create Tag” as the action event.
2. Connect Your Account
Continue to connect your Shoutbase account. A window will appear requesting access to your Shoutbase account. Authorize Zapier to connect to your Shoutbase account by clicking the “Allow” button. If you do not have a Shoutbase account yet, go to shoutbase.com to register and verify your account.
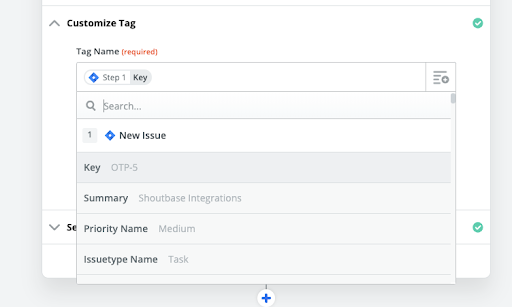
3. Customize Tag
We want the name of the tag to be dynamic, based on the key of the Jira issue. To do this, click the dropdown menu and select “Key” under “New Issue.” Using the issue key will ensure that the tag name is unique, which is a requirement in Shoutbase. If you attempt to create a tag with the same name as an existing tag, the new tag will not be created.
4. Finish Up
After entering the tag name, click the “Continue” button. Run your test. Once you receive your success message from Zapier, your Zap is ready for activation. Turn on your Zap. This is done by toggling the grey switch at the top of the screen to “On.”
When your Zap is on, Zapier will continuously poll your Shoutbase account for new time records. If it’s off, the Zap won’t work.
See Your Zap in Action
1. Create a New Issue in Jira
Log into Jira and create a new issue for your project. The issue key will be used as the Shoutbase tag name in later steps.
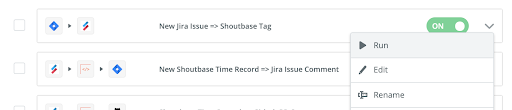
2. Manually Run Your Zap in Zapier
Zapier polls the Jira API for new time entries every 5-15 minutes, so you won’t instantaneously see your new Shoutbase tag appear. However, you can manually trigger Zapier to run your Zap and check for issues instantly. To do this, go to your Zaps dashboard in Zapier, find your Shoutbase/Jira Zap, click the dropdown menu, and click “Run.”
3. Check Shoutbase Tags
View your tags in Shoutbase. To do this, log into Shoutbase. From your personal dashboard sidebar, click the dot menu beside “Tag Overview.” Select “Manage Tags.”
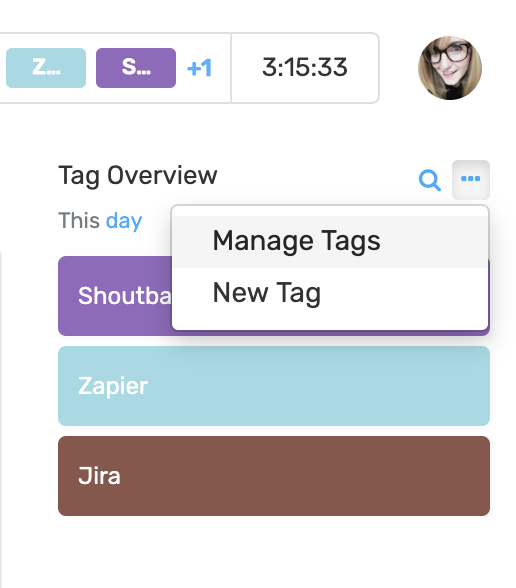
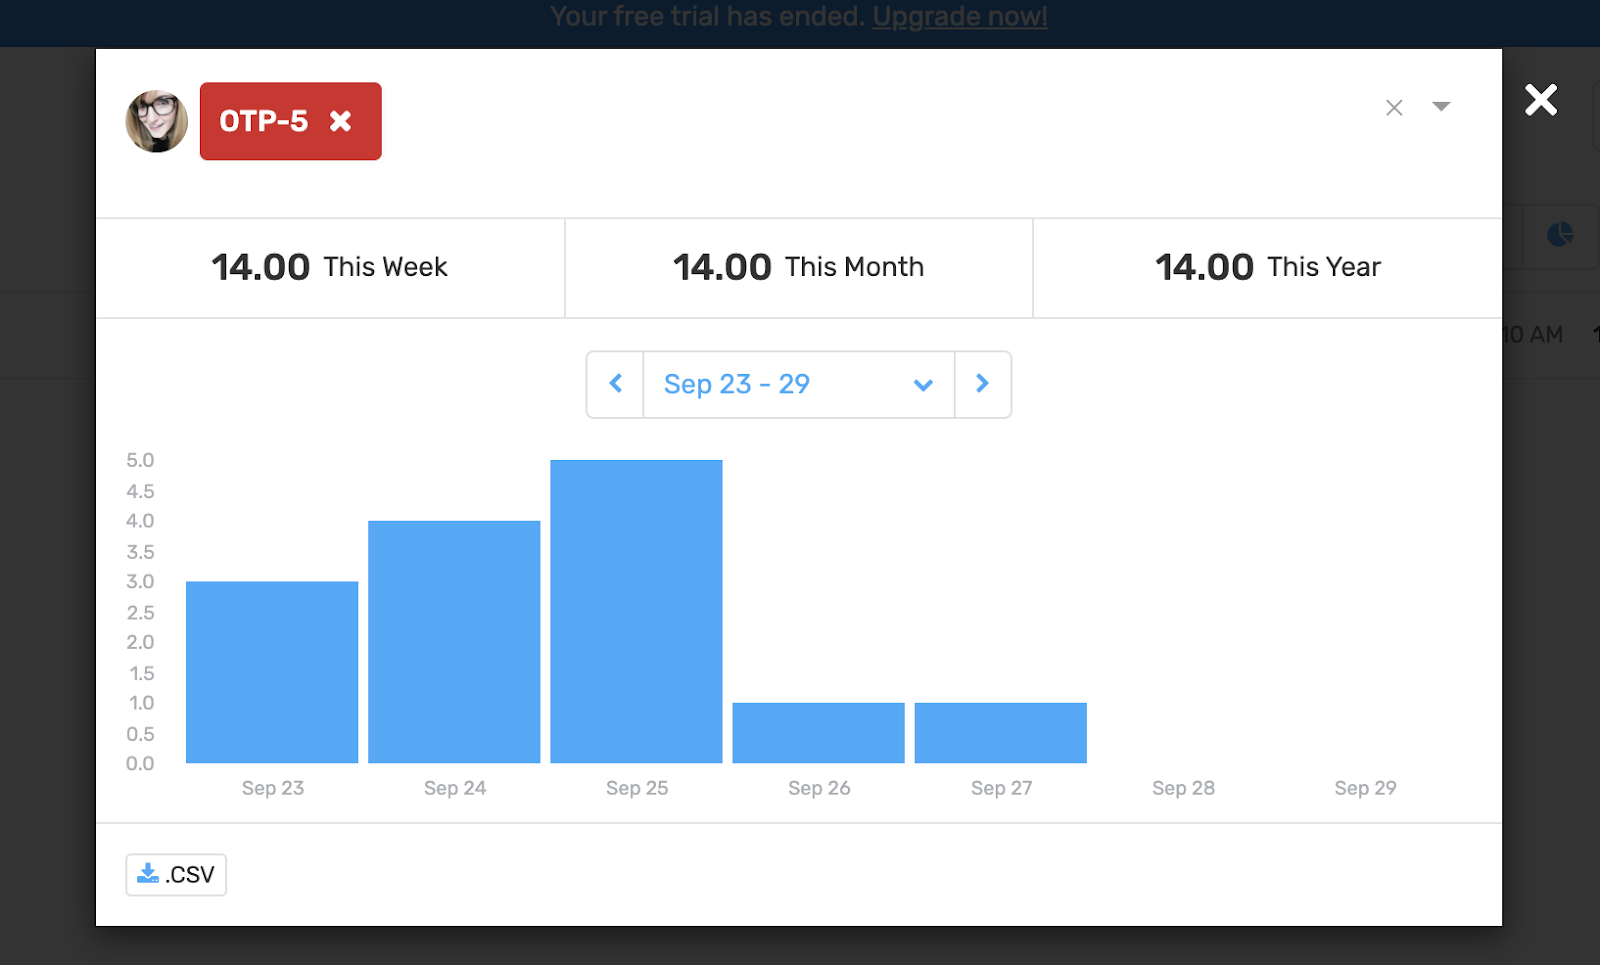
Your tag admin window will open. You should see the new tag appear with the key of your Jira issue. In my case, it’s OTP-5.

To receive a report of your Jira issue tag, click “Report.” For now, the report is empty because your tag is brand new. But as you track time for this issue, Shoutbase will store your progress. At the end of the week, you can revisit this report and get an instant calculation of how much time was spent on the issue. You can download this report as a csv file and use the information to enter time in Jira or another system, bill clients, or simply retain it for your own data collection.
When the Jira issue is no longer relevant, you can also use this tag admin modal to edit or retire your unused tags.
For more information about entering time in Shoutbase or managing time entries with tags, check out these easy to follow tutorials to get the most out of Shoutbase.
Conclusion
By picking the right tools and understanding how to integrate them, simple Zaps like the one I outlined above can drastically improve your workflow, boost your productivity, and help you do whatever it is you do better. And this is only the beginning. The possibilities for integration and optimization are endless.
At Shoutbase, we’re actively expanding our platforms capabilities to integrate with other systems like Jira, Github, and Slack by using Zapier. Keep an eye on this blog for more updates about Shoutbase, and if you do create an integration with Shoutbase, we’d love to hear from you!
If you’re interested in learning more, check out my other articles about why and how integrations can make us all better at doing what we do.
Better Time Tracking for Jira Using Shoutbase & Zapier
Tracking Time on GitHub PRs Using Shoutbase & Zapier
Automated Time Tracking and Billing Integration with Shoutbase & Quickbooks
What did we miss?
Please let us know by tweeting to @shoutbase on Twitter.
Stormi Hoebelheinrich
Developer of Shoutbase and Olio Apps.
LinkedIn: @shoebelheinrich
Thanks for reading!
If you would like to learn more about Shoutbase, please follow us on Twitter, Instagram, Facebook, LinkedIn, or Medium!