
How to Create Invoices with Shoutbase & Zapier
With Shoutbase, you can easily prepare reports from your time records. What can you do with those reports? Pretty much anything—create and send a new invoice via email, bill for your services in another app (like QuickBooks), enter data into a spreadsheet, communicate the report to your company, etc. What if there was a way to do all of those things automatically and instantly without any tedious data entry? There is, and it’s called Zapier.
Zapier is an automation tool that allows web apps to communicate with each other. Getting started is easy. Follow along to learn how to submit a report from Shoutbase to Zapier (and other services) with the click of a button.
Overview
By the end of this guide, you will understand the following:
- How to prepare a report in Shoutbase for yourself or a member of your team, filtered by a given date range, tag, or team.
- How to use Zapier to make a “New Report” Zap that will automatically transform the data from your report into a Google Doc invoice.
- How to trigger the “New Report” Zap using the Shoutbase App.
Requirements
Getting started with Zapier and Shoutbase is easy and does not require any special technical skills. However, the following requirements are necessary to complete the Zap.
1. Zapier Account
If you’re new to Zapier, sign up for an account. Zapier includes a free tier and a 14-day trial of premium features, which is perfect for getting started. Check out their Getting Started Guide to learn more about Zapier and making “Zaps.”
2. Shoutbase Account
If don’t have a Shoutbase account yet, you are in the right place! Sign up for Shoutbase by going here. Using Shoutbase is free for individuals.
3. Access to Google Docs
In this guide, the “Zap” that we create will produce a Google Doc containing the details from your Shoutbase time report. You can make a different Zap with an alternative end result, such as sending an email, posting a Slack message, or creating a QuickBooks invoice, but if you’re following along with this guide, you’ll need to have a Google account.
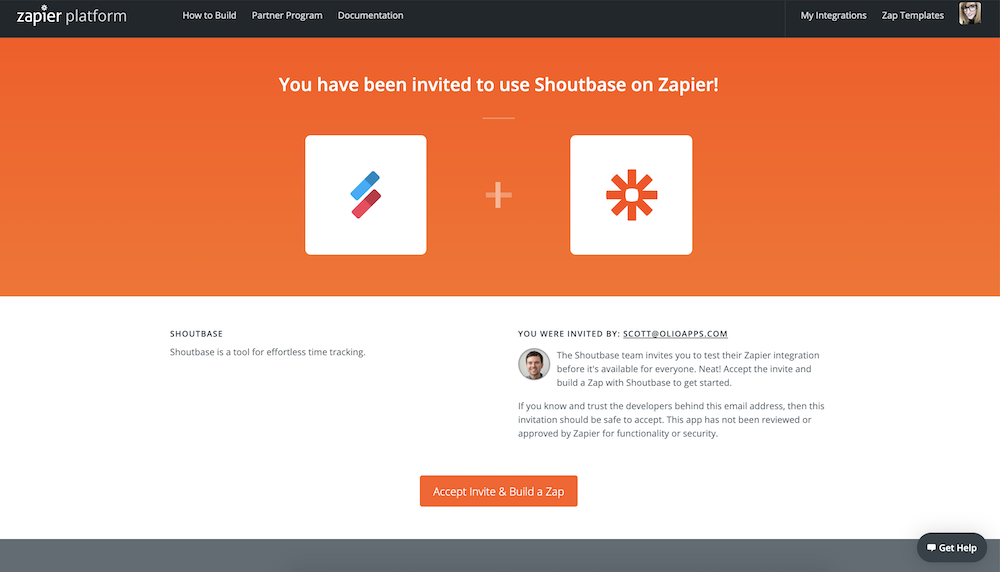
4. Accept Invitation to Use Shoutbase on Zapier
The Shoutbase integration on Zapier is new and currently in beta version, which means it doesn’t show up with the other Apps in Zapier. To use the Shoutbase App on Zapier, follow the link below and accept the invitation to use Shoutbase by clicking “Accept Invite & Build a Zap.”
https://zapier.com/developer/public-invite/31432/fa70581019fd453aed7317c47eb43d99/
Reports in Shoutbase
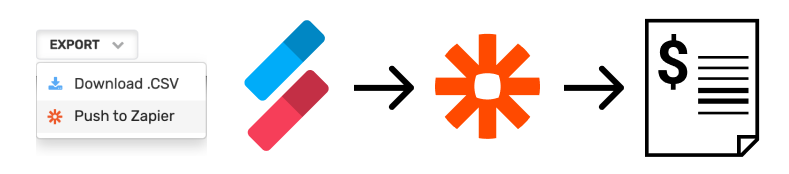
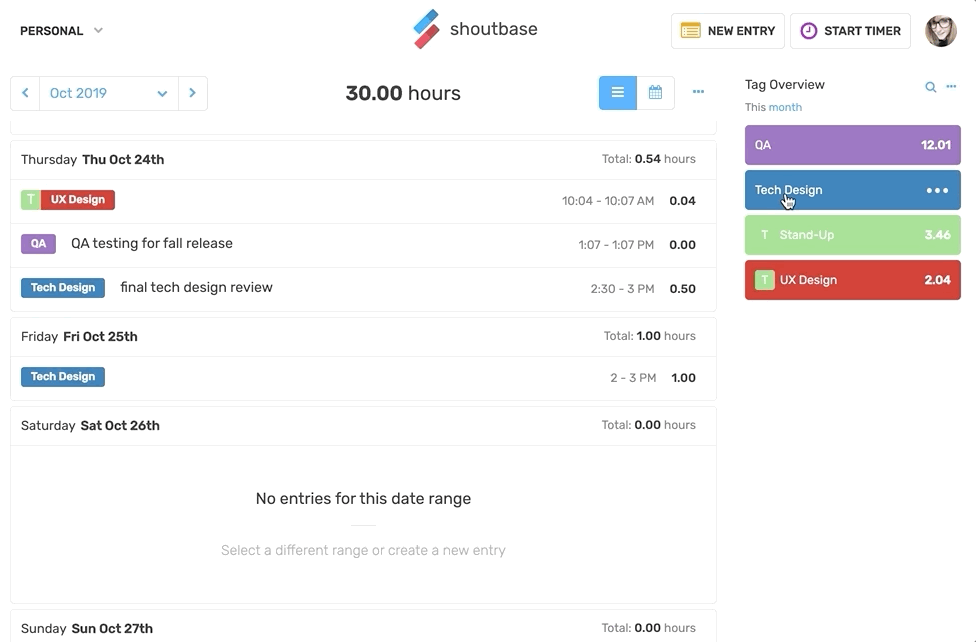
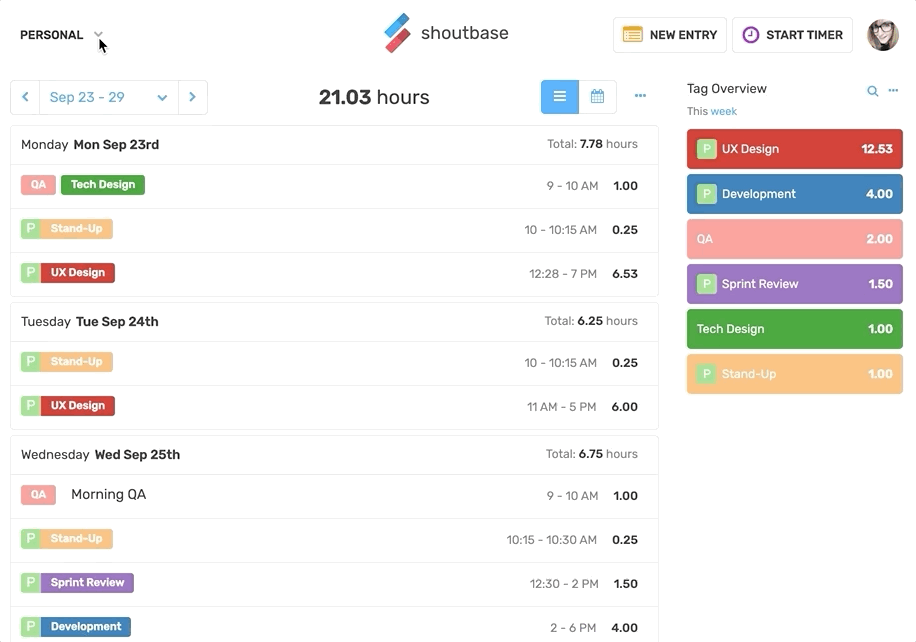
Shoutbase has a simple yet powerful interface for creating reports, allowing you to see your own or your team’s time at a glance. You can filter data by tags, users, or date range. In the reports modal, you can click to download the raw time data in CSV format or export the report to Zapier. Here’s how to create customized reports to suit your needs using the Shoutbase user interface.
Reports for Tags
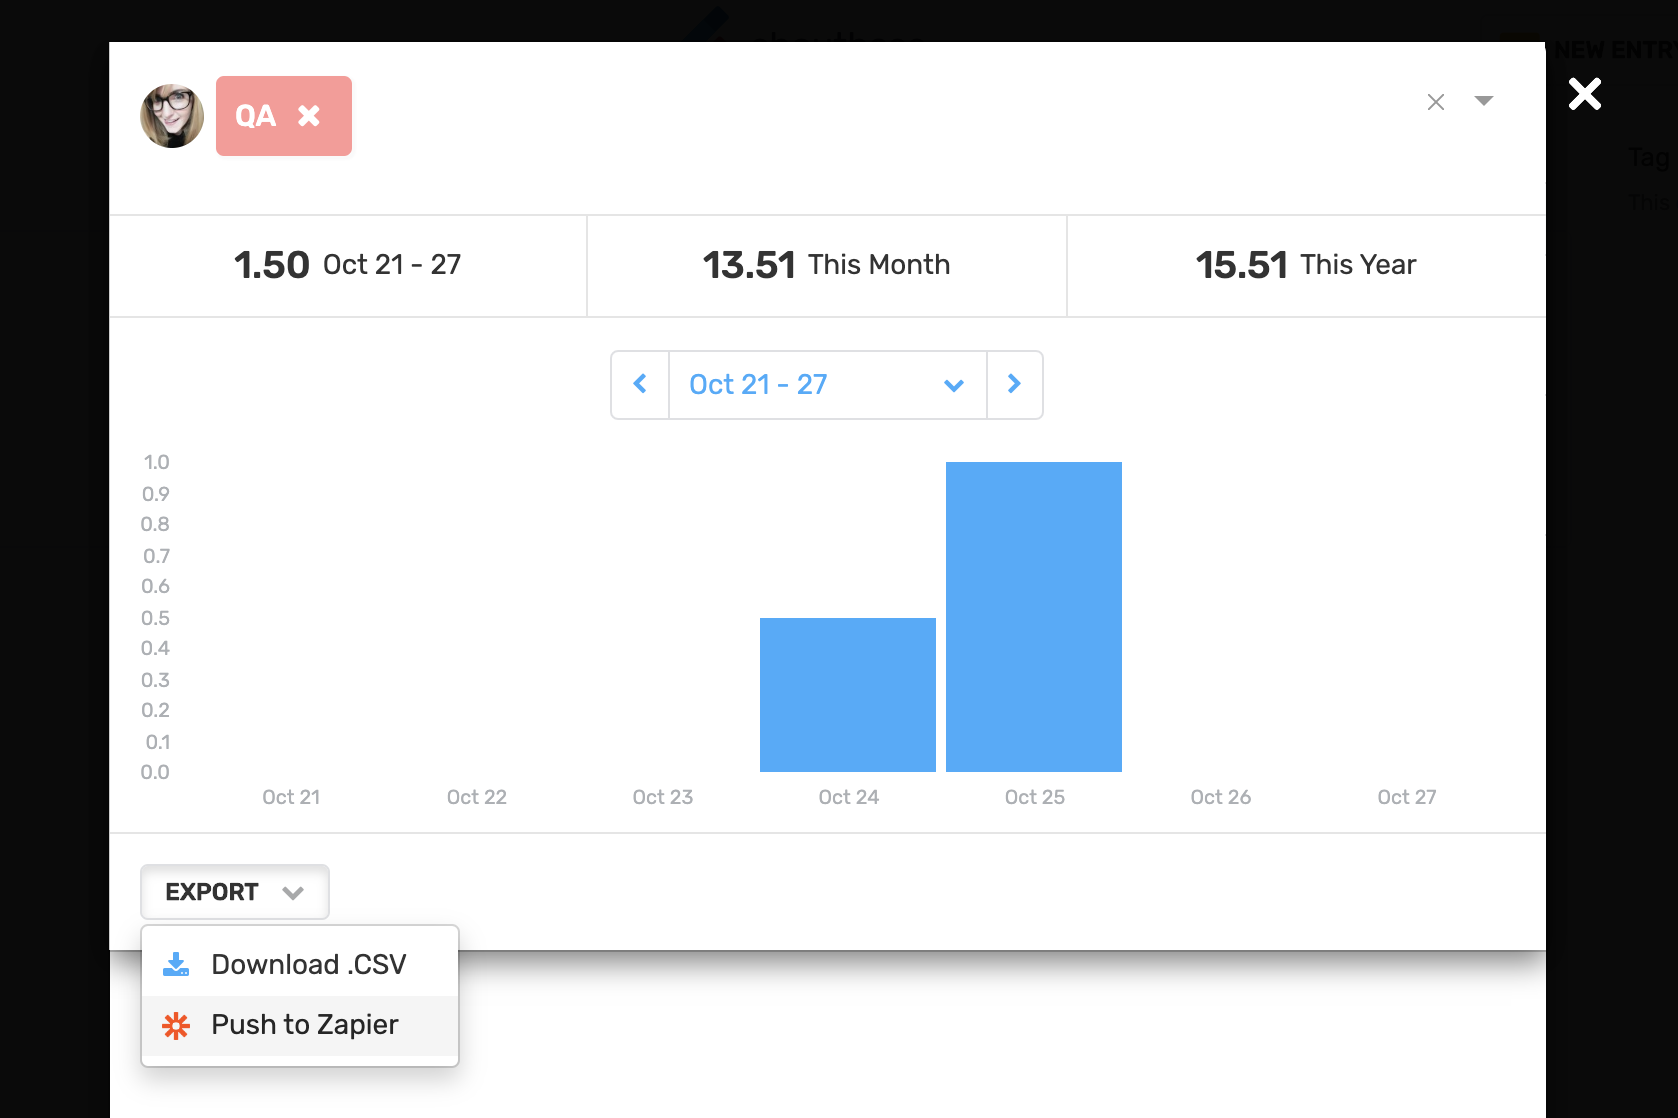
Shoutbase uses tags to categorize time. You can prepare a report that is filtered by a tag or set of tags. To open the tag report modal, you have two options. First, you can click directly on the tag that appears in the right sidebar of your dashboard. Alternatively, you can select “Manage Tags” from the “Tag Overview” dropdown in the right sidebar. This will open the Tag Admin Modal, a list of all the tags for your selected team (or personal dashboard). Click “Report” beside the tag.
You can filter by more than one tag by adding additional tags at the top of the Tag Report Modal. Only time records that contain all selected tags will appear in the report.
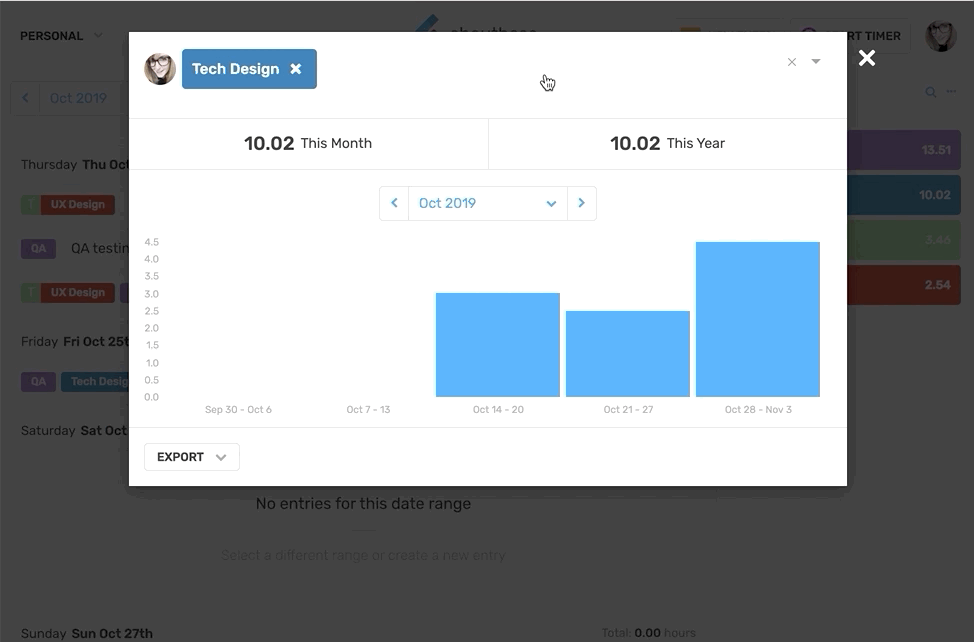
You can customize the date range of the report by clicking the current date range and selecting from week, month, or year. Use the left and right arrows to choose the dates for the desired time period.
Reports for Teams
Shoutbase can manage time records for an entire team. If you are a team owner or admin, you can prepare a report for your whole team or an individual. If you are a team member without admin access, you can view your individual report for the time records associatd with your team. To view the report for an entire team, select the team from the Team Dropdown menu in the upper left corner. From the team dashboard, click the button next to “Members” in the right sidebar. Select “View Report” from the menu that appears. The Report Modal will appear with a report for the whole team (if you are an admin or team owner). You can add tags to filter your team report as desired.
To create a report filtered by an individual member, close the Report Modal. Again, click the button next to “Members” in the right sidebar. This time, select “Manage Members” from the menu that appears. You will see the Team Admin Modal appear with a list of team members. If you are an admin or team owner, you can view a report for any member on your team. If do not have admin permissions, you can view your own report. Click the “View Report” button. As with the other Report Modals, you can filter by tags, change the date range, and use the export buttons (more on that later).
New Report Zap Using Zapier
Now that we understand how to prepare a report in Shoutbase, let’s create a Zap that will automatically turn the report into a Google Doc invoice.
Log into your Zapier account. Once logged in, click “My Zaps.” Here you will see your Zap dashboard. This is where you can see and control the Zaps you’ve created in the past or create a new Zap. Click the “Make a Zap!” button.
Trigger
In the “Choose App & Event” field, start typing “Shoutbase.” Select the Shoutbase option with the highest version number. In the “Choose Trigger Event” field, select “New Report.” Click the “Continue” button.
The next step is to choose your Shoutbase account. Click the “Search & Select” field and click “Add a New Account.” A pop-up window will appear. Use this window to authorize Zapier to access your Shoutbase account. After accepting the authorization, the pop-up window will close. Click the “Continue” button.
After connecting your Shoutbase account, the “Find Data” section will appear. Click the “Test and Continue” button. This will make a request to Shoutbase for a time record report. You will use the data from that report to help you fill out the next steps. This concludes the Trigger step.
Calculate Invoice Price
Next, we need to add a step to calculate the invoice price. This is the total duration (in hours) multiplied by your hourly rate. To do this, select “Code by Zapier” as the App and “Run Javascript” as the Action.
In the “Customize Run Javascript” section, enter “Duration” into the first “Input Data” field. In the second “Input Data” field, click the plus button and select “Duration” from the options.
In the “Code” field, we will add Javascript code to perform a simple mathematical operation. Copy the code below and paste it into the “Code” field. In this case, we have hard-coded the rate to be $75 an hour. You can change this based on your rate. You can also add more sophisticated code that dynamically determines the rate based on tag names or other data in the report, but for this example, we will keep it simple.
That’s it for the Javascript step. Click the “Continue” button.
Action
It’s time to define the final Action. For our Action, we want to use the data from the previous step (Run Javascript) and the Trigger step (New Report) to create a basic invoice in Google Docs.
In the app selection field, start typing “Google Docs.” Select it when it appears. For the “Choose Action Event,” select “Create Document from Text.” Next, click “Sign in to Google Docs.” In the pop-up window, select your Google account and allow access. When the pop-up window closes, click the “Continue” button in Zapier.
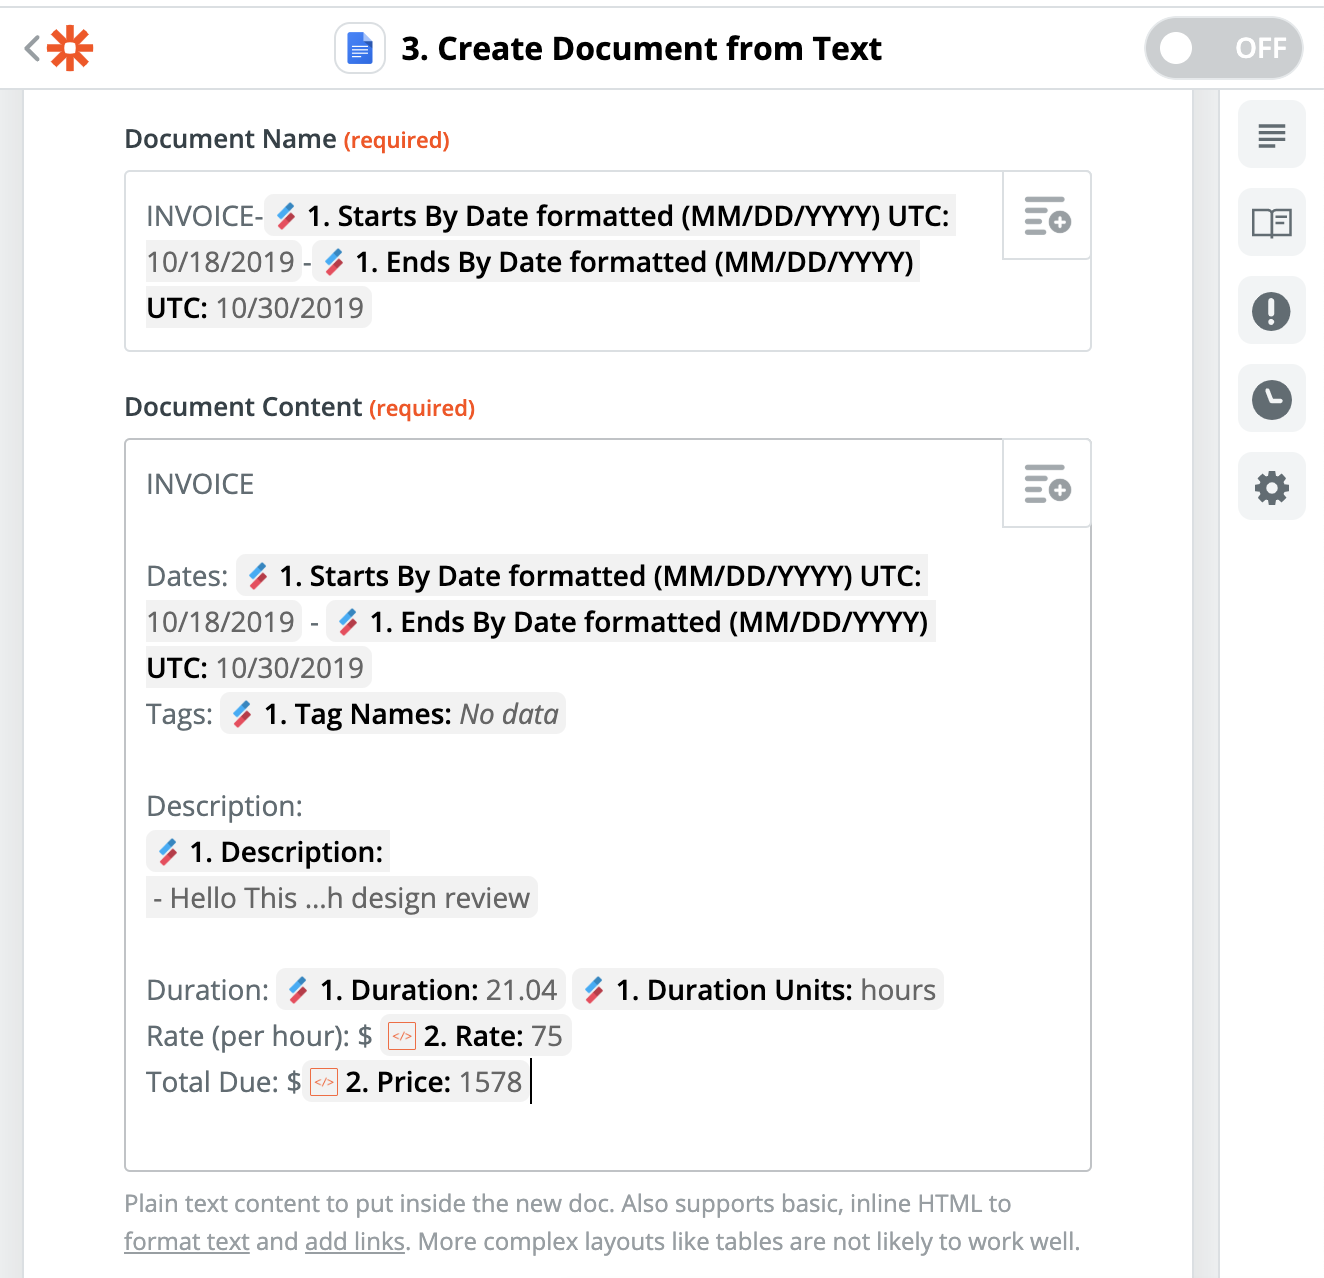
Next, we’ll customize the Google Document. For the “Document Name,” type “INVOICE-“ and include the formatted “Starts By Date” and “Ends By Date” from the report. This is just an example of a document name. You can customize it to meet your needs.
Fill out the “Document Content.” Use the plus button in the upper right corner of the text area to include data from the report and code output. The image below shows how I filled out the “Document Content” field.
Choose a folder in the “Folder” field or leave “Root” selected. Click the “Continue” button. Click “Test and Continue.” When the test is complete, your Zap is ready to turn on! Click the On/Off toggle at the top of the screen to turn on the Zap.
Push Report to Zapier
Return to the Shoutbase App, and open a tag report modal. The steps to do this are outlined in the “Reports for Tags” section above. Select your desired date range for the report. Click the “Export” dropdown button, then click the “Push to Zapier” button. You should receive a green message indicating the push to Zapier was successful. If a blue pop-up appears indicating that you do not have Zapier set up, go back to the Zap and confirm that you turned it on. If it persists, refresh your Shoutbase session by reloading the webpage and try again.
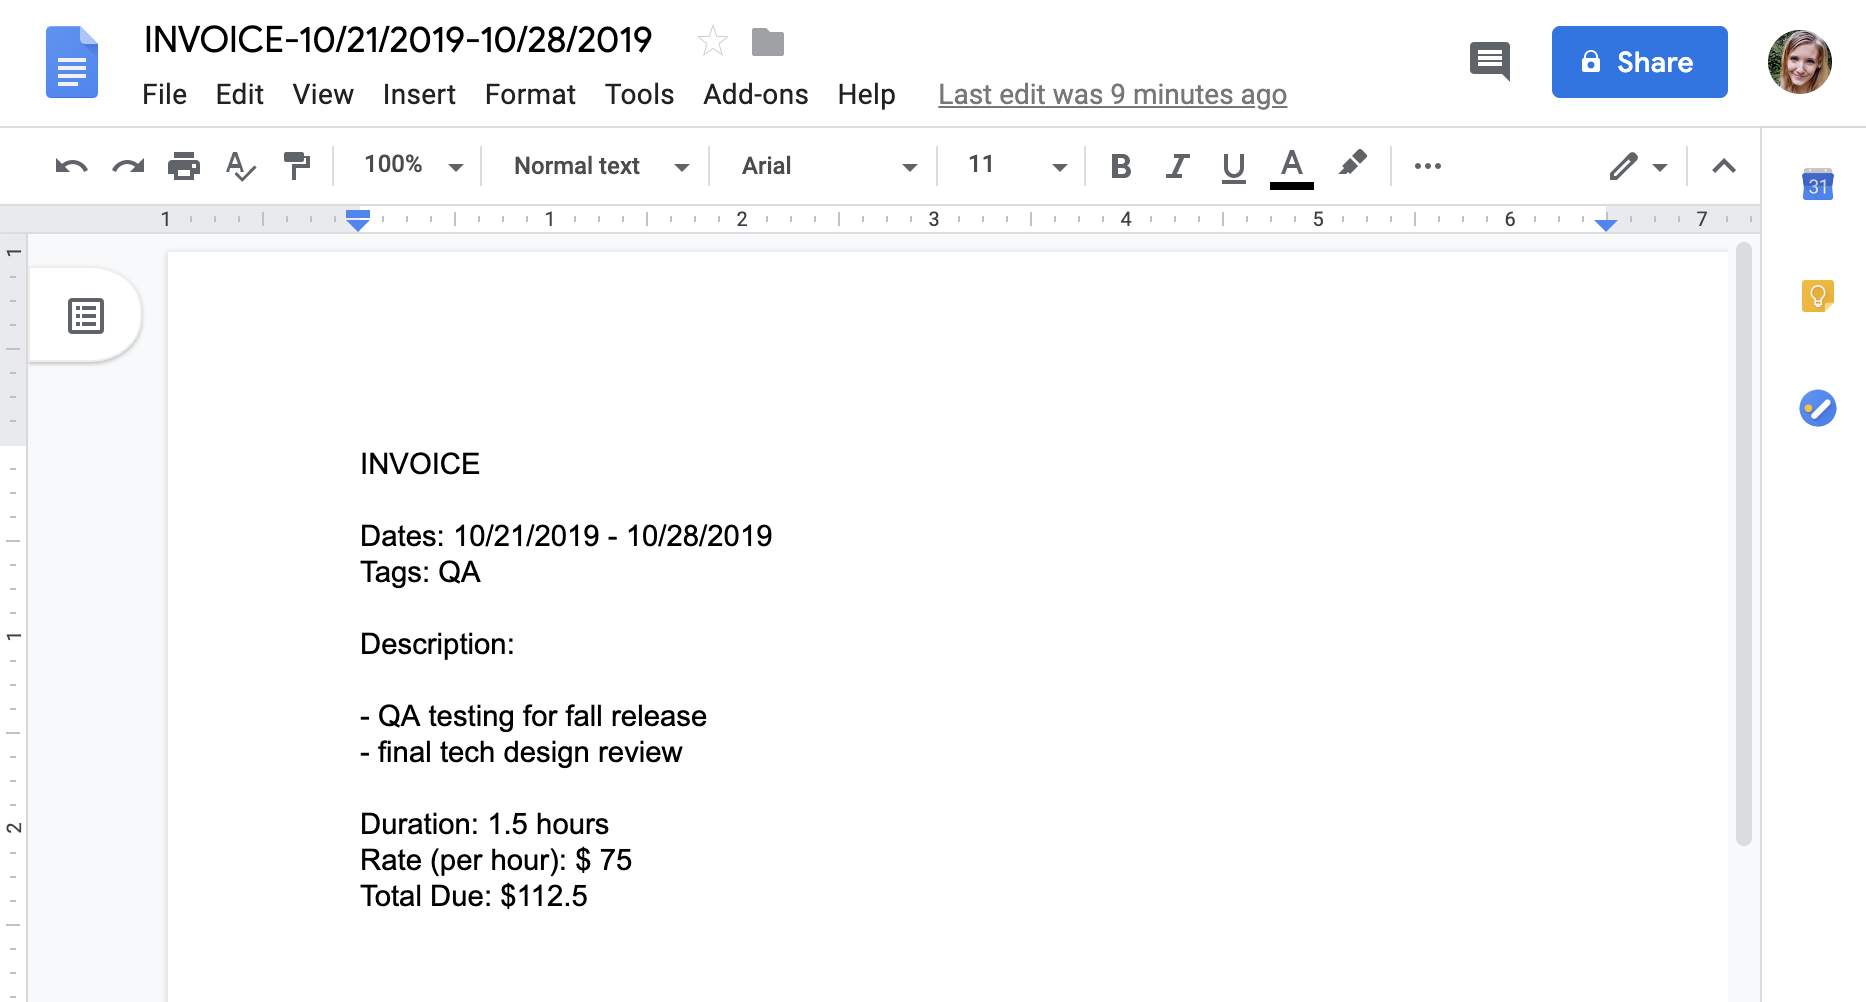
Go to your Google Docs. Look for your new invoice. Mine looks like this:
Going Forward
Your first Shoutbase Report Zap is complete. But there is a lot of room for customization. At Shoutbase, we encourage you to explore different ways of customizing Zaps like this one to automate tasks, meet your needs, and improve your workflow.
What did we miss?
Please let us know by tweeting to @shoutbase on Twitter.
Stormi Hoebelheinrich
Developer of Shoutbase and Olio Apps.
LinkedIn: @shoebelheinrich
Thanks for reading!
If you would like to learn more about Shoutbase, please follow us on Twitter, Instagram, Facebook, LinkedIn, or Medium!